


The inventors of real-time audio restoration, digital dialogue noise suppression, adaptive limiting and spectral editing.


TRADE SHOW
Experience the Next Generation of CEDAR DNS at NAB 2026
Experience the Next Generation of CEDAR DNS at NAB 2026
BUSINESS UPDATE
CEDAR Audio Appoints GerrAudio Distribution in Canada
CEDAR Audio appoints respected audio specialists GerrAudio to manage distribution in Canada.
CEDAR Audio Appoints GerrAudio Distribution in Canada
CEDAR Audio appoints respected audio specialists GerrAudio to manage distribution in Canada.
PRODUCT REVIEW
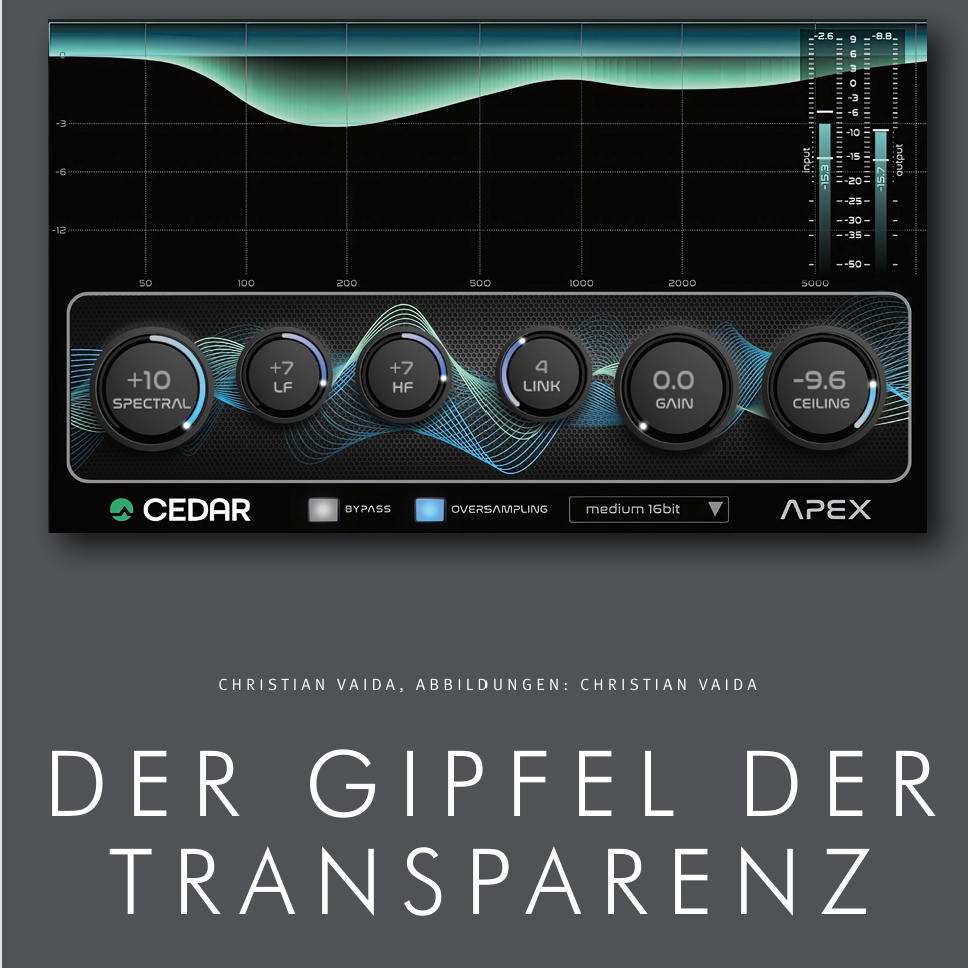
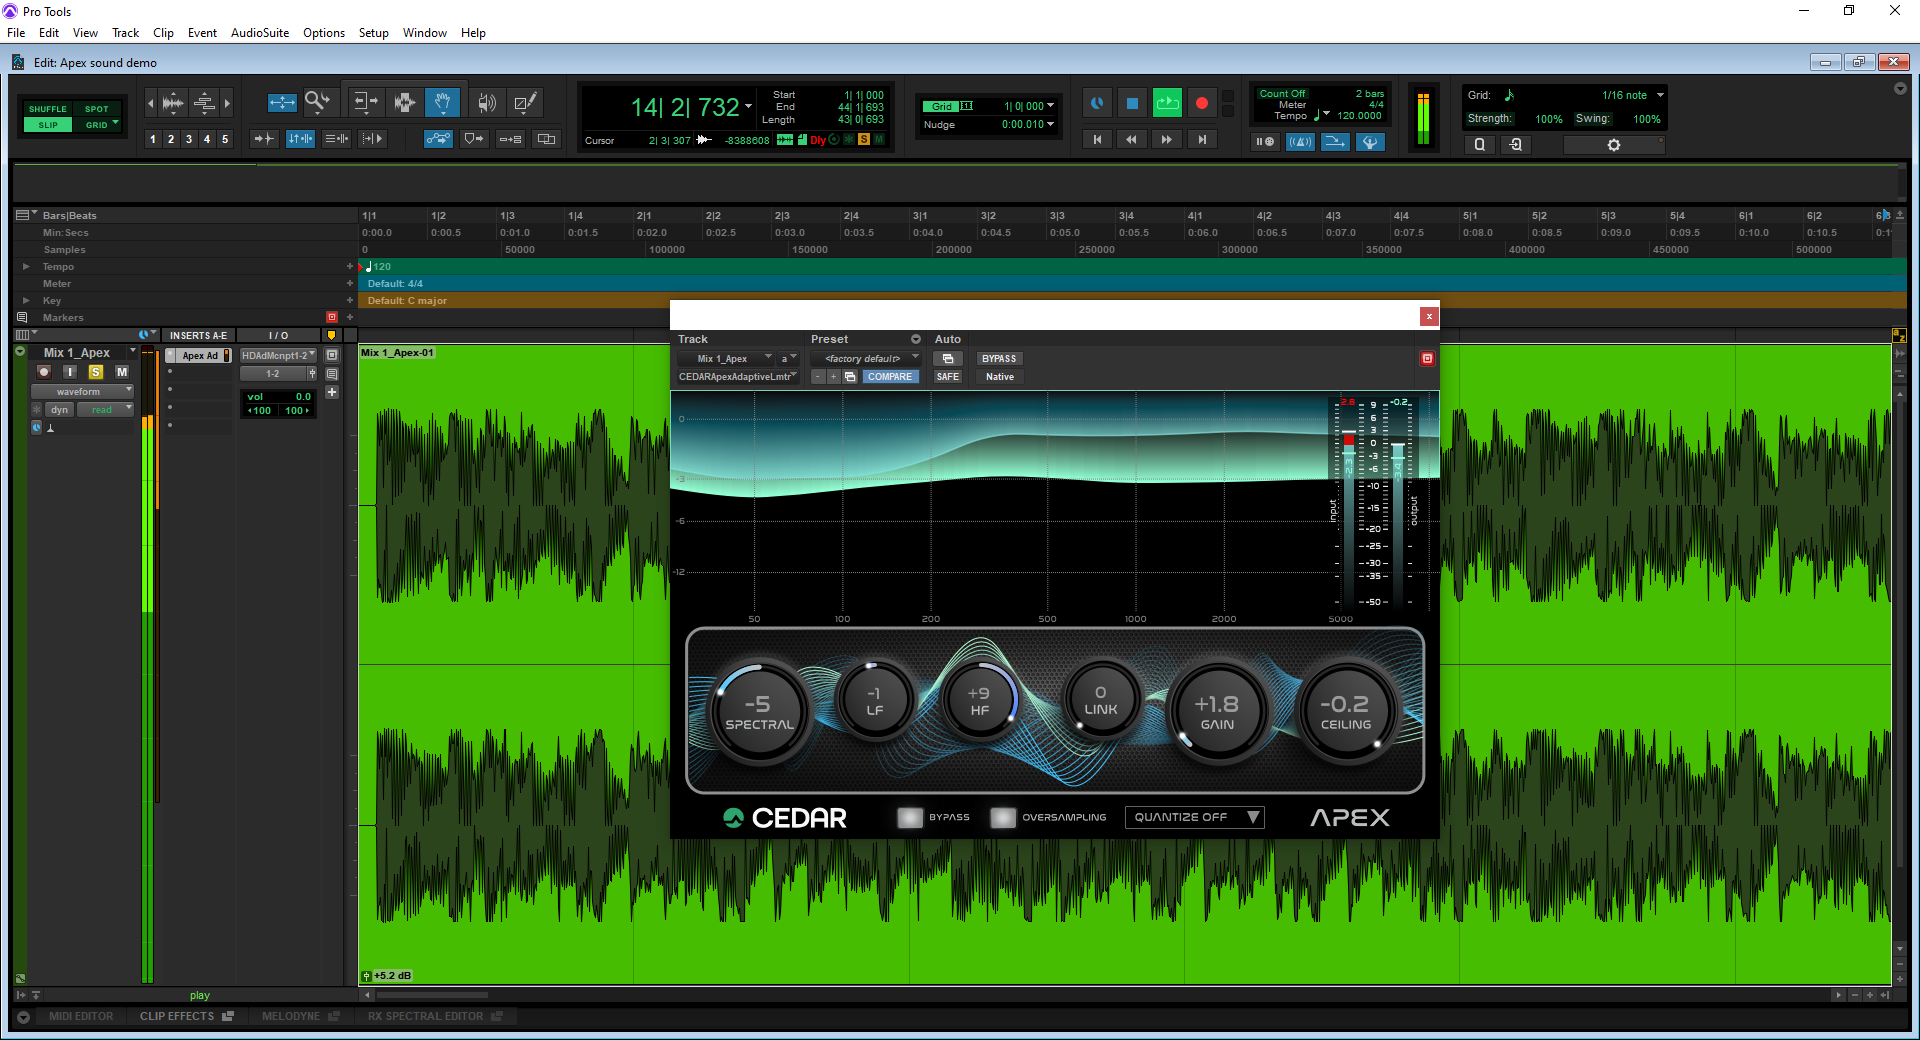
Sound Magazin in Germany reviews CEDAR APEX Adaptive Limiter
Studio Magazin has reviewed the new APEX Adaptive Limiter plug-in from CEDAR Audio, calling it "the new gold standard for mastering and demanding post-production tasks".
Sound Magazin in Germany reviews CEDAR APEX Adaptive Limiter
Studio Magazin has reviewed the new APEX Adaptive Limiter plug-in from CEDAR Audio, calling it "the new gold standard for mastering and demanding post-production tasks".
PRODUCT LAUNCH
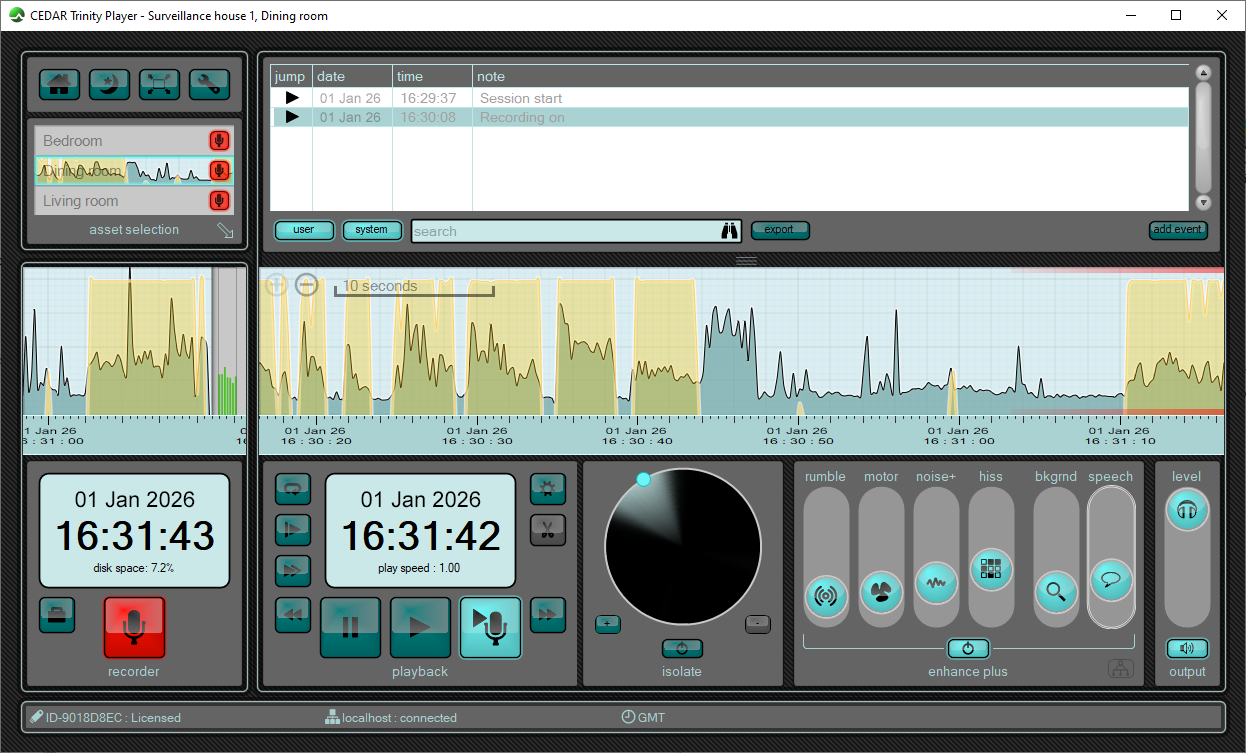
Introducing CEDAR Trinity™ 7.
CEDAR Trinity 7 is the latest version of our powerful audio surveillance software suite, updated to improve compatibility with external data streams and third-party devices, as well as offering several important new administration and permissions options.
Introducing CEDAR Trinity™ 7.
CEDAR Trinity 7 is the latest version of our powerful audio surveillance software suite, updated to improve compatibility with external data streams and third-party devices, as well as offering several important new administration and permissions options.
CASE STUDY
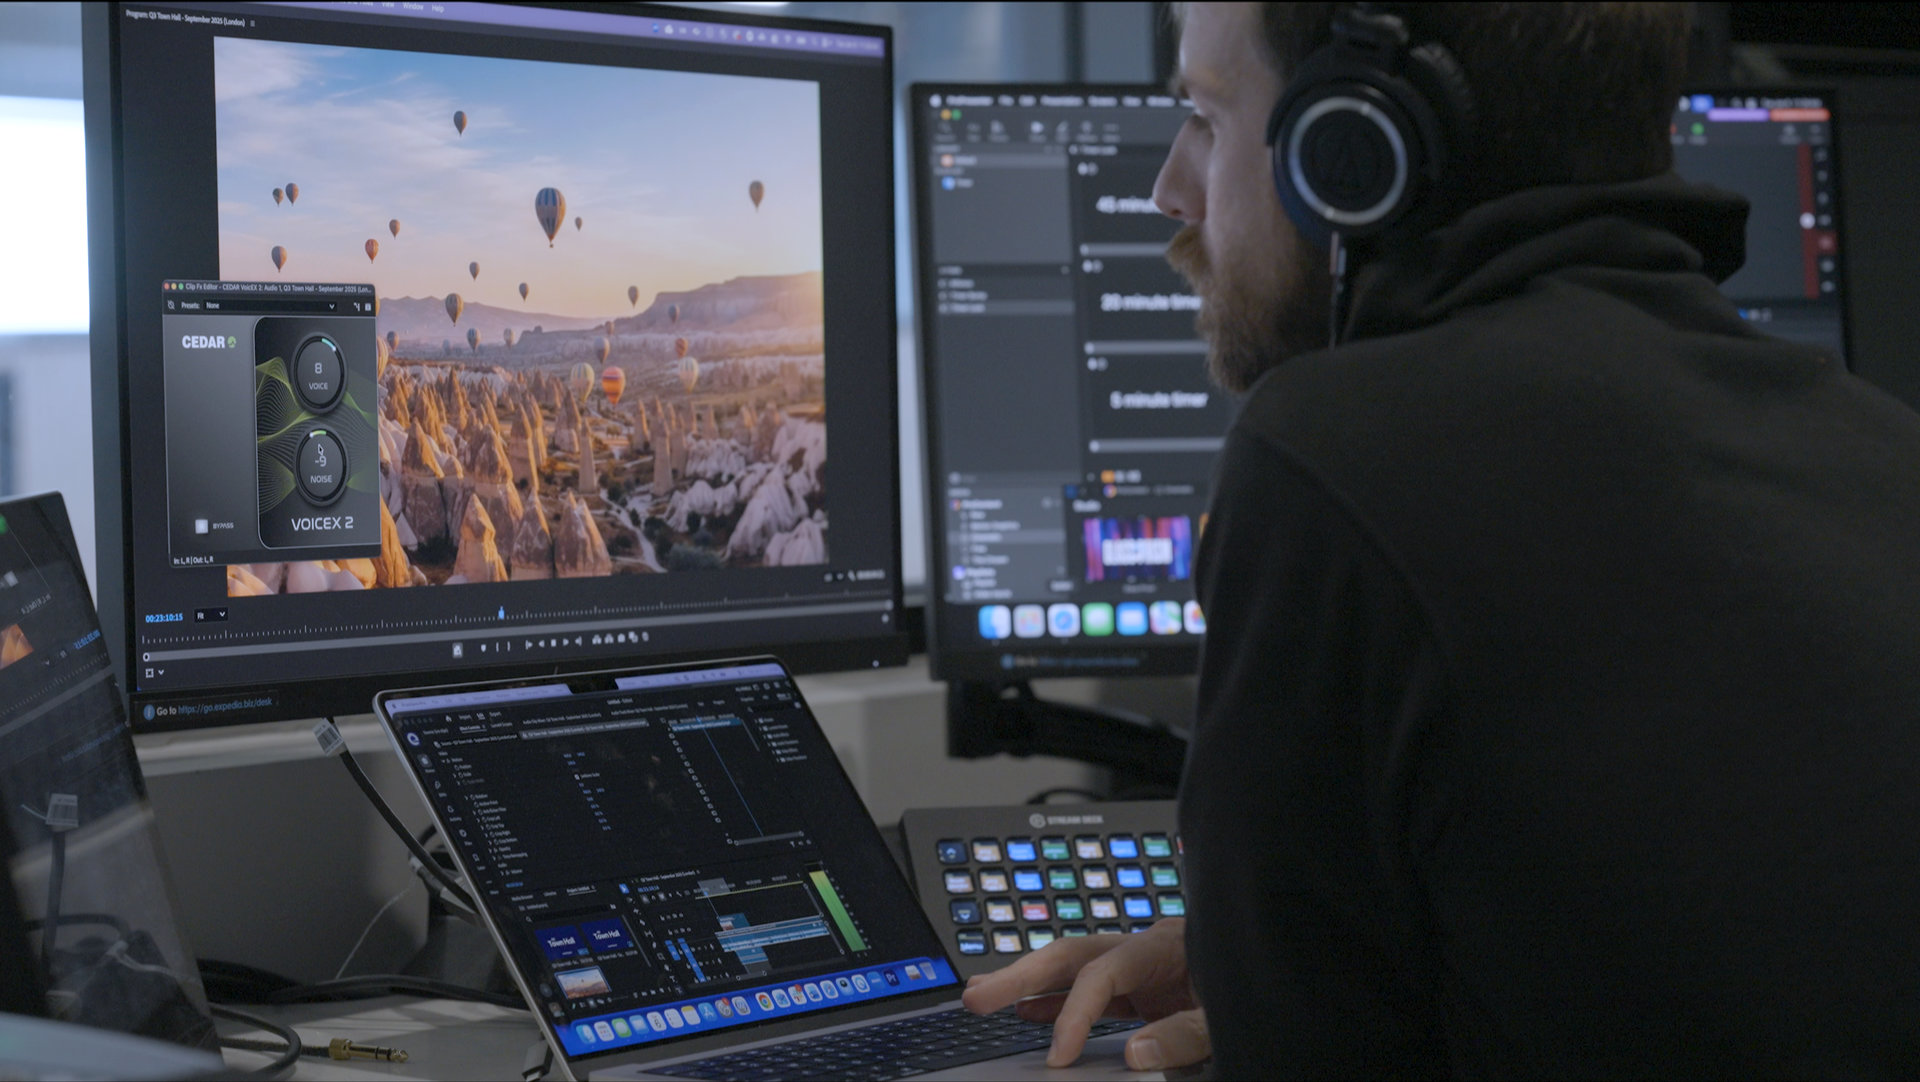
Expedia Group Powers Communications with CEDAR Audio’s VoicEX 2.
“I’ve tested a whole variety of de-noisers and CEDAR’s VoicEX 2 does a fantastic job of removing unwanted noise while maintaining very natural-sounding speech” - Matt Jones - Expedia Group
Expedia Group Powers Communications with CEDAR Audio’s VoicEX 2.
“I’ve tested a whole variety of de-noisers and CEDAR’s VoicEX 2 does a fantastic job of removing unwanted noise while maintaining very natural-sounding speech” - Matt Jones - Expedia Group
PRODUCT LAUNCH
CEDAR Audio Launches APEX - The Next Generation of Adaptive Limiters.
Meet APEX - the new flagship in our range of adaptive and spectral limiters. Push the limits of your audio without loss of transparency, depth or soundstage!
CEDAR Audio Launches APEX - The Next Generation of Adaptive Limiters.
Meet APEX - the new flagship in our range of adaptive and spectral limiters. Push the limits of your audio without loss of transparency, depth or soundstage!

PRODUCT ANNOUNCEMENT
Introducing the CEDAR DNS 8S noise suppressor
Following in the footsteps of our existing DNS processors, we've designed the DNS 8S, a noise suppressor designed specifically for live sound and broadcast where audio over IP isn’t required.
Introducing the CEDAR DNS 8S noise suppressor
Following in the footsteps of our existing DNS processors, we've designed the DNS 8S, a noise suppressor designed specifically for live sound and broadcast where audio over IP isn’t required.

CASE STUDY
CEDAR VoicEX 2 - better than any other plug-in I've tested
"I’ve tried a lot of plug-ins to reduce noise, but none has come even close to CEDAR’s products."
CEDAR VoicEX 2 - better than any other plug-in I've tested
"I’ve tried a lot of plug-ins to reduce noise, but none has come even close to CEDAR’s products."